Interfacing Intel 8051 with 64K ROM

The Intel 8051 microcontroller is one of the earliest popular microcontroller and is still widely used. It is a 40 pin Integrated Circuit which has 128 byte capacity on chip RAM, 4K on chip ROM, two timers, one serial port, four I/O ports and 6 interrupt sources.

In this blog it is shown how intel 8051 chip can be interfaced with external memory. The external memory can be either RAM or ROM of various sizes. Since 8051 has 16 address lines it can be interfaced upto 64K addressable location. If the addressable location is only memory RAM or ROM then the highest capacity memory is 64K RAM or 64K ROM.

One 64K ROM is the 27C64 which is CMOS EPROM. The chip diagram is shown below,


The following schematic shows how a 64K ROM can be interfaced with the 8051 microcontroller.


In the circuit diagram above, since the port 0 pins are address and data multiplexed, they must be demultiplexed using decoder such as 74LS373. The output of the 74LS373 is the address lines A0 to A7. The remaining addresses(A8 to A15) comes from port 2. The address A0 to A7 from the output of 74LS373 are connected to the address lines of A0 to A7 of the 27C64 CMOS EPROM. The address lines A8 to A12 from the microcontroller are connected to the A8 to A12 of the EPROM. The rest of the address lines A13 to A15 are used for chip select. The A13 to A15 address lines are connected to the 74LS138 decoder three inputs. The output is taken from the output line Y7. To enable the decoder the enable G1 must be high and G2Aand G2B must be low. So G1 is connected to the power supply and G2A and G2B are grounded.


Read More..

Design steps for Sequence Detector FSM

A sequence detector is an example of Finite State Machine because during its operation it undergoes through finite number of states before outputting signal that it has detected a particular sequence.

Consider the figure below which is a sequence detector. The input to this sequence detector is a binary data streams(maybe 01011010101111001010001111) and it has additional two inputs a reset and a clock. The reset when applied puts the sequence detector to a known state. And if the detector detects 111 in sequence then it outputs a 1.


The design of a sequence detector like the one shown above starts with drawing a state diagram from the problem specification. For a sequence detector for example, the question can be specified as design a circuit that detects three consecutive 1s and outputs 1 when the sequence is detected. So in this case the problem can be solved using FSM.

An example of a state diagram is shown below.


Once we have the state diagram, the next step is to draw a state table from the state diagram. The state table contains the same information as the state diagram. The advantage of using now a state table is that it facilitates in deriving next state logic equation and output equation. By contrast a state diagram facilitates in drawing a map of the problem.

A state table for the above state diagram looks like the following:


The next step is to choose the type of flip flop to use for the states. A D flip flop provides the simplest implementation but many times other flip flop such as JK flip flop is more useful as it reduces the combinational circuit implementation as in case of a counter design.

Once you have the state table the next step is to assign state variables to the states. Note that here there are two types of state variables- one for the present state and one for the next state. Following shows the update state table with state assignments-


 Note that the output z column does not have any input x indicated because the design is of Moore type.

After assigning the state variables, the next state variables are solved as a function of the present state variables and the input variables. The tool used to solve the state variables is the commonly used Boolean function solver like the Karnaugh Map.

Finally the circuit is drawn from the knowledge of the next state logic equation and the output equation.

The following shows the simulated waveform obtained.


Read More..

Tutorial For Cosplay Effect

Material:-
Cosplay Curve - Download by clisking here

Open the photo and stay on the Home tab
Open a photo to edit
Filter > Smart Blur >4.0
Bright,Color > Contrast Enhancement > Middle
Filter > Effect Film > Velvia > Middle
Bright,Color > Color Curves > Apply the Curve Which U have Download From Material
& Click Ok
Sharpen > 6

Result:-


Read More..

Tutorial For Lightening Effect

Lightening Effect

Material:-
 Texture
Open Photoscape> editor> open a photo
Filter> Noise Reduction> High
Filter> sticker> # 1
Brightness, Color>Deepen> Low
Click above for high-level
Go upstairs to the texture object to open the safe!
Set the opacity to 64 and adjust the texture in the picture,
then click photo + object
Go to start tab
Ctrl + c on the picture!
Go to gif animation and ctrl + v
Return to the editor and click Undo and ctrl + c in the photo
Go to the animated gif and ctrl + v
And save!
Result:-

Read More..

Tutorial For fashion Illuminate

Effect Fashion Illuminate
(This effect has to be done in very dark pictures, and a medium gray tone)

Open the photoscape and stay on the Home tab •
Open a photo To edit

- Back light 100 (+/-)
- Filter> Noise Reduction > High
- Filter> Smart Blur > 8.0
- Sharpen >13
- Filter> Film Effect > Cross process > Middle
- Bright, Color> Contrast Enhancement > high
- Bright, Color> Brighten > high
Result:-

Read More..

Tutorial For Skin Effect

Skin effect
- Filter> Noise Reduction> High
- Filter> Effect Movie> Velvia - High [O2 TIMES]
- Brightness, Color> Remove color cast> colour & level On Maximum
- Filter> Effect Movie> Velvia medium [O2 TIMES]
- Back light> (+) 2OO%
- Sharpen> O4
- Result:
- Before---------------------------After
Read More..

The Simpsons

Read More..

Molduras de Coração


Read More..

Hack Traffic Blog

Pada kesempatan kali ini saya akan menjelaskan Hack Traffic Blog,
Sebelumnya mungkin anda bertanya-tanya kenapa dalam judul artikel saya "Hack Traffic Blog". Yups, karena saya juga suka hack jadi saya juga artikel yang berbau hack. Sebelumnya saya punya ide seperti ini gara-gara teman sekelas saya minta tolong kepada saya untuk meningkatkan traffic blognya. Lalu saya tiba" punya ide seperti ini. (Ini hanya dilakukan di warnet saja)


1. Login di warnet.

2. Bobol deep freezenya. kalau anda tidak tahu cara membobolnya anda bisa lihat Disini (untuk deep freeze 4,5,6) dan Disini (untuk Deep freeze 7)

3. Setelah Deep Freezenya sudah dibobol dan deep freezenya sudah di non-aktifkan

4. Buka Browser Firefox, Ubah Home Pagenya dengan nama blog anda. lalu aktifkan lagi deep freezenya.

5. Setelah deep freezenya di aktifkan kembali, lalu coba buka firefox lagi untuk memastikan home pagenya adalah blog anda.

PERHATIAN !!! Misalnya cara ini sudah dilkukan ke 10 komputer. 1 komputer, sehari kurang lebih 10 pengunjung (pemakai komputer) berarti blog anda dikunjungi sekurang-kurangnya sebanyak 10 pengunjung. Jadi jika 10 komputer maka pengunjung blog anda sehari adalah 100 pengunjung. Coba bayangkan jika anda melakukan cara ini ke 20,50 or ke 100 komputer??? Coba bayangkan berapa banyak pengunjung blog anda dalam sehari. hahahahaha
Read More..

Tutorial For Line Effect

Line Effect

Open your PhotoScape and click "Editor ".
Open your photo to edit
Filter-Noise reduction-Middle
Brightness, Color>Darken>Middle(Gray Tone)
Brightness, Color>deppen>Low
Filter> Effect Movie>Cinema>Low
Filter>linear gradient, set this:-
Keep Bottom
Range -32%
Margin -10
Print(color  Of Your Choice I Choose Red)
Auto Level>High
Filter> Effect Movie>Vélvia>Low
Sharpen>4
Frame-Printiline Frame-02

Result:-
Read More..

Blue Bottles


Read More..

Text


Read More..

Tutorial For Dark Green Effect

Dark  Green Effect

Materials:-

Download from Here

Open PhotoScape click Editor
Open the photo to edit.
Brightness, Color> Color Curve> Open (Curve)and open the curve 1
Filter>Film Effect> Portra >High
Brightness, Color> Color Curve> Open (Curve)and open the curve 2
Filter>Film Effect> cinema>Low
Filter>Film Effect> Cross Process>Middle
Click On Object> Photography> Photo ...
and open the glow point png and place in the center position.
Click photo + objects

Result:-

Read More..

Plaquinhas


Read More..

Download IDM 6 10 Final Build 2 Full Patch

Internet Download Manager kali ini sudah mengupdate ke versi 6.10. Nah, sekarang saya akan membagikan Internet Download Manager 6.10 ini Final Build dan Full Patch nya. Jadi, bagi sobat yang tidak sabar mengupdate Internet Download Manager ke versi terbaru, silakan saja download file nya, dan ikut tutorial yang sudah saya berikan. Sebelum saya langsung masuk ke tutorial, dibawah ini adalah keunggulan baru yang di berikan IDM di versi terbarunya ini:
  • Fixed a bug in IE integration module because of which "Tracking Protection Lists" feature of Internet Explorer did not work properly

Oke, sekarang kita masuk ke tutorial penginstallan IDM 6.10 ini, berikut adalah langkah-langkahnya:

  1. Download File yang sudah saya cantumkan di bawah
  2. Matikan antivirus anda terlebih dahulu
  3. Ekstrak semua file download, termasuk file patch nya
  4. Install IDM yang ada di file itu, dan jangan lupa close terlebih dahulu IDM versi sebelumnya
  5. Setelah di install nanti ada pesan fake serial number. Di tutup saja
  6. Klik kanan file patch. Klik patch
  7. Selesai (Jangan lupa untuk mengaktifkan kembali antivirus anda jika sudah selesai penginstallan semuanya)


Download IDM 6.10 Final Build 2 Full Patch (4.48MB) (Mediafire)


Jika Dibutuhkan Password: www.remo-xp.com

Jika link error atau rusak, mohon segera laporkan ke saya agar cepat saya carikan solusinya.
Terima kasih! Semoga Bermanfaat!

Read More..

Download Film Man of Steel 2013 CAM


Download Film Man of Steel (2013) CAM - Man of Steel merupakan film sekuel Superman terbaru yang akan dirilis pada tanggal 14 Juni 2013. Film ini di sutradarai oleh Zack Snyder. Film Man Of Steel di bintangi oleh Henry Cavill, Amy Adams, Russell Crowe, Diane Lane, Michael Shannon, Kevin Costner, Laurence Fishburne, Christopher Meloni, Antje Traue, Harry Lennix, Ayelet Zurer, Richard Schiff, Jadin Gould, Cooper Timberline.Film ini mengisahkan seorang pria yang bekerja sebagai wartawan di sesuatu surat kabar yang bernama Clark Kent ( Kal-El/Superman ) yang diperankan oleh Henry Cavill. Dia jadi aneh serta terasing dengan kemampuan yang dimilikinya.

Info: IMDb Release Date: 14 June 2013 (USA)
Genre: Action | Adventure | Fantasy
Stars : Henry Cavill, Amy Adams, Michael Shannon
Quality: CAM
Encoder: SHQ@Ganool
Source: CAM NEW AUDiO XViD – JUSTiCE
Size: 600MB
Subtitle: Indonesia, English
Synopsis: A young itinerant worker is forced to confront his secret extraterrestrial heritage when Earth is invaded by members of his race.

Trailer


Screenshot


Link Download

Download | (.mkv) | 600 MB | 4 Part or Single Link | Password : xversailez | By Tinypaste (Putlocker,Akafile,dll)

Terima kasih!
Semoga bermanfaat!

Source : http://ganool.com/man-of-steel-2013-cam-600mb-ganool
Read More..

Belajar Mengetik 10 Jari dengan Bantuan Software

Belajar Mengetik 10 Jari dengan Bantuan Software


Masih ingat waktu pertama kali mengenal komputer, waktu itu saya belajar microsoft word. Saat disuruh mengetik, saya sentuh keyboard dengan jari telunjuk dan mulai mengetikkan tugas yg diberikan guru TIK. Di akhir pelajaran beliau bilang "cobalah untuk belajar mengetik dengan menggunakan 10 jari" mungkin beliau memperhatikan apa yang saya lakukan akan tetapi membiarkan saya tetap mengetik menggunakan 2 jari telunjuk kanan dan kiri. (ko malah curhat...???)
Ok, kembali ke topik. Mengetik dengan menggunakan 10 jari tentu saja memiliki banyak keuntungan diantaranya pekerjaan akan cepat selesai. Akan tetapi masih banyak kita jumpai orang atau teman kita sendiri yang mengetiknya seperti saya jaman doloe (walaupun sekarang masih belum lancar pke 10 jarinya :D). Tetapi dengan bantuan software Alice Touch Typing Tutor 1.1 kita bisa belajar mengetik 10 jari dengan mudah.

Alice Touch Typing Tutor 1.1 adalah software yang sangat powerfull, sangat user friendly sehingga mudah digunakan. Terdapat pengukur kecepatan kita dalam mengetik sehingga kita dapat mengevaluasi hasil latihan setiap saat.

  Download Alice Touch Typing Tutor 1.1 + keygen
Read More..

CARA MUDAH MENGCOPY TEKS WEB BLOG YANG MENGGUNAKAN PROTEKSI ANTI COPAS

CARA MUDAH MENGCOPY TEKS WEB/BLOG YANG MENGGUNAKAN PROTEKSI ANTI COPAS


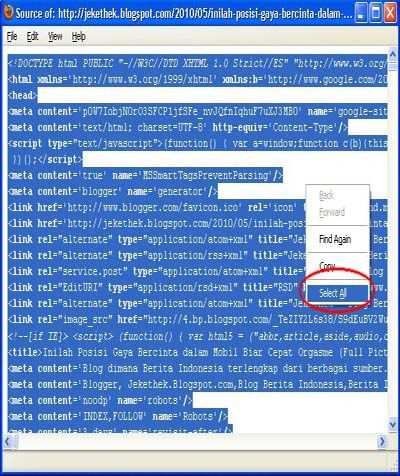
Ngeblog adalah curahan pikiran dan imajinasi yang ditorehkan dalam tulisan. Tapi bagaimana kalau imajinasi kita habis? Atau kita sedang miskin ide? Sedangkan blog kita butuh update secara berkala. Tentunya kita akan mencari sumber lain untuk meteri blog kita bukan? Dan kebetulan anda beruntung saat blogwalking mendapati suatu artikel yang sangat menarik yang sesuai dengan konsep blog anda, namun alangkah malangnya anda sewaktu hendak meng-copy artikel tersebut mouse anda tidak berfungsi saat di klik kanan. Anda juga tidak dapat menyeleksi tulisan tersebut untuk di copy.boot
ingskoBlog
Jika anda menemui kasus seperti tersebut diatas, berarti blog/web tersebut dilindungi kontennya oleh si pemilik. Biasanya si pemilik melindungi blognya dengan cara menambahkan script untuk mendisable klik kanan atau menggunakan plugin anti copy-paste (pengguna WordPress). Sudah jelas tujuannya adalah agar tidak bisa di-copy oleh pihak lain. Pelit amat padahal belum tentu kontennya asli buatannya sendiri. Betul?
Banyak jalan pintas menuju surga, bukan bom bunuh diri ataupun jihad salah jalan. Namun cara untuk mengambil konten yang di proteksi tersebut. Caranya sangat super mudah, anda tidak perlu menguasai atau menggunakan jurus hacker terkemuka dunia. Cukup baca artikel ini saja. Sudah ratusan blog yang saya uji cobakan dengan cara saya ini, semuanya berhasil tercopy dengan sempurna. Tidak peduli itu blognya para master blogger maupun blog amatiran yang sok jadi master.
Langsung saja sharing bagaimana caranya dapat meng-copy artikel dari blog yang diproteksi.
  1. Gunakan web browser Mozilla Firefox.
  2. Buka blog/web yang diproteksi dan yang ingin anda copy artikelnya.
  3. Kemudian pada menu bar Firefox, pilih [View] > [Page Source].
  4. Kemudian akan ditampilkan halaman kumpulan kode HTML dari blog tersebut.
  5. Kemudian anda seleksi semua kumpulan kode HTML itu atau klik kanan dan pilih [Select All].
  6. Dan klik copy atau Ctrl+C.
  7. Login ke akun blog anda.
  8. Paste-kan pada area penulisan anda dalam mode HTML.
  9. Kemudian kembali ke mode Visual untuk WordPress dan Compose untuk Blogspot.
  10. Silahkan hapus bagian elemen dan aksesoris yang tidak diperlukan, cukup pilihlah artikelnya saja.
  11. Sangat super mudah kan???
NB:
  1. Saya tidak mengajarkan anda untuk mencuri konten, namun sebagai sharing semata.
  2. Cara ini bisa dipakai di Blogspot dan WordPress.
  3. Untuk web browser lain caranya hampir sama dengan menggunakan Firefox.
  4. Copylah artikel dari blog/web yang tidak berlisensi atau tidak terdaftar kepemilikannya secara hukum.
  5. Silahkan copy semua artikel dari blog/web yang diproteksi namun bukan hasil karya asli si pemilik.
Read More..
Powered by Blogger.